In part 1 of this article, I reviewed the ever-evolving phases of converting the old horse pasture into a dream garden. It’s pretty daunting to look at an open field and reimagine it in terms of walls and ceilings and garden rooms or sections. I suppose it’s even more difficult when it’s located well away from the views of my home, yet still on my property. I have to deliberately visit the space to ponder the design, even without respite from the heat and sun.
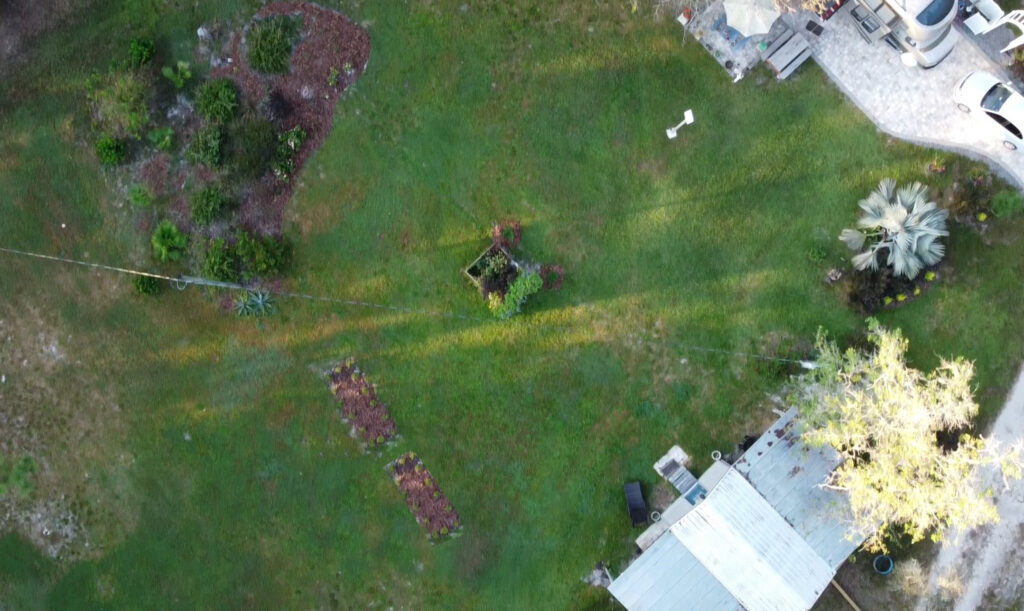
I did find it extremely helpful to take plenty of photos, including drone footage, to help. I also found it useful to just pick a spot and start digging, intuitively, just to get something started.
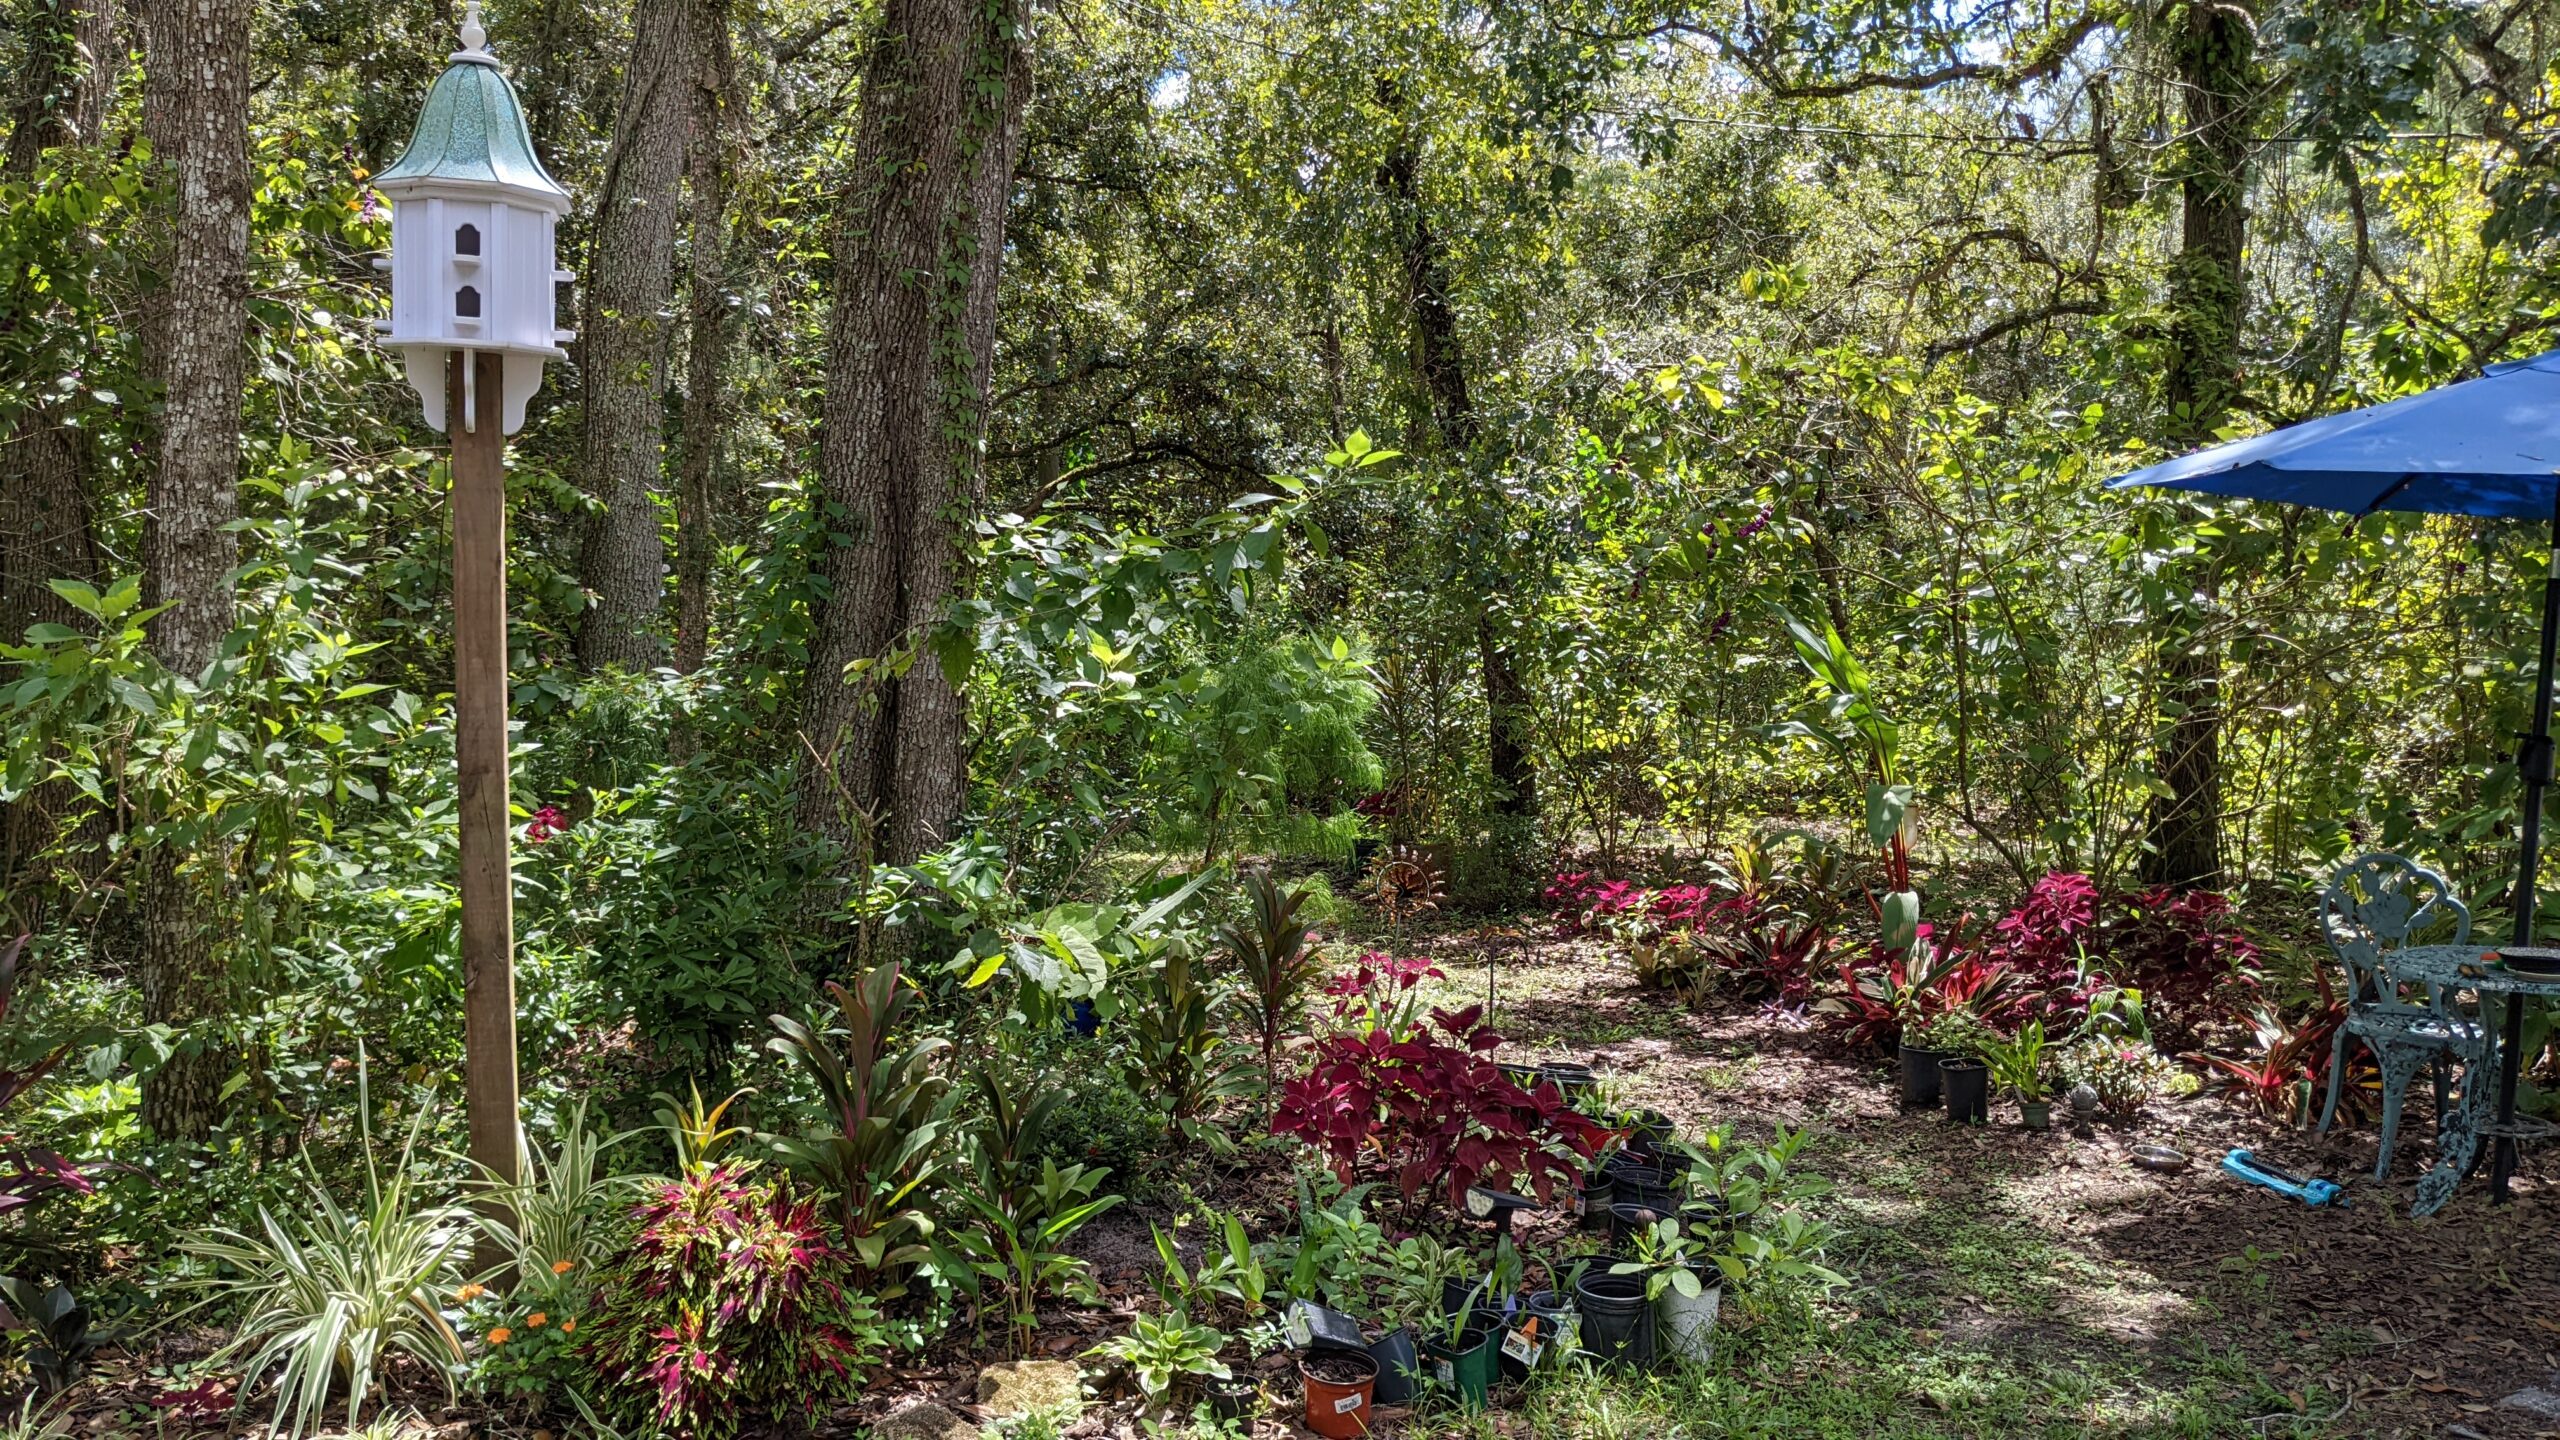
I suppose that cedar bed just popping up out of nowhere kinda’ hindered the design and I often contemplate dismantling it and placing it somewhere else. I do consider it a layout challenge, however, and opted to keep it and design around it.
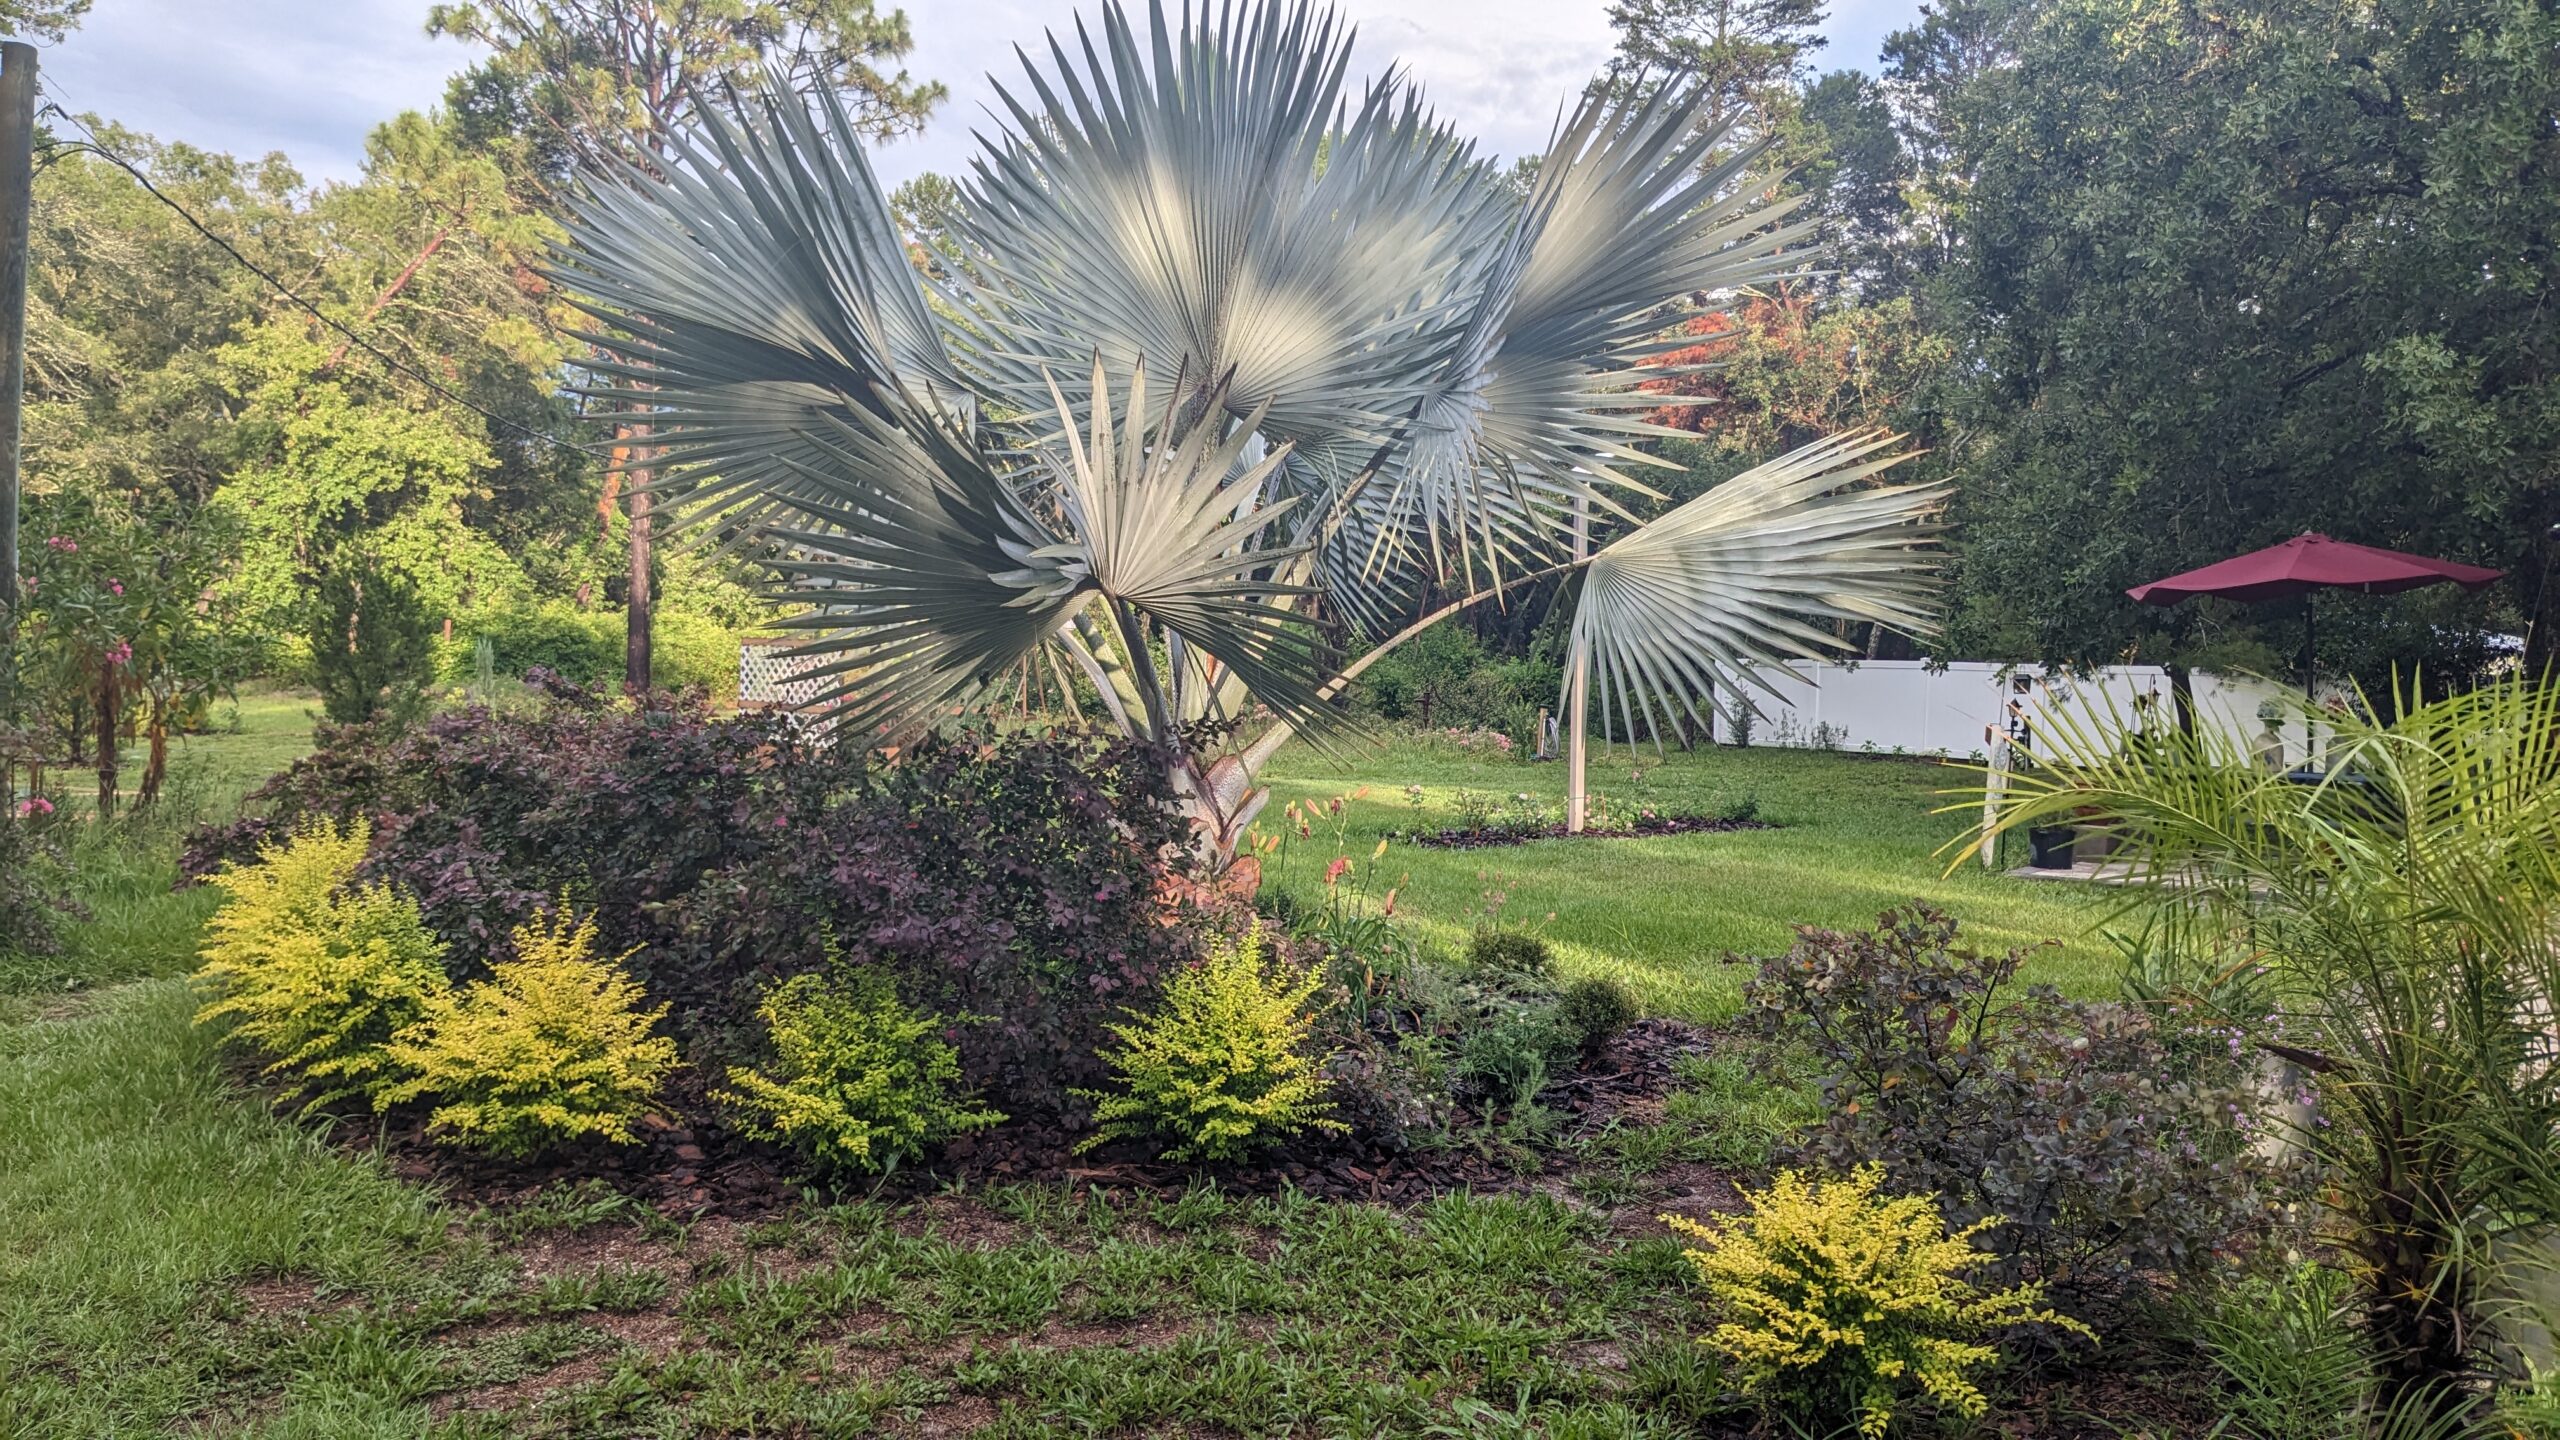
Well, the first phase was the pavers for the RV driveway. Then, I planted a Bismarck palm and a row of loropetalum. Next came the sun garden to add privacy from the neighbor’s yard. That was followed by the cedar bed, landscaping at the front of the paved drive, and sprucing up under the Bismarck with daylilies, roses, and dwarf mounding hollies. Around that time, I also planted two linear rectangles of boxwoods surrounding Mrs. B.R. Cant antique roses. That was followed by the Oak Leaf Holly privacy hedge and now this… the Hurricane Katrina (a.k.a. Peggy Marting) climbing rose carport trellis.
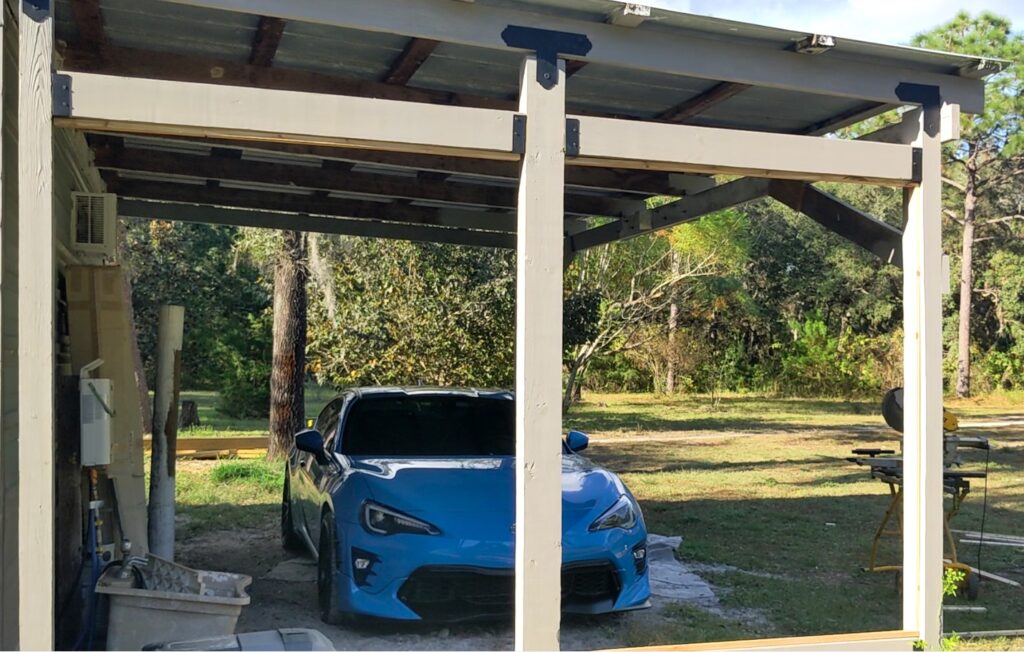
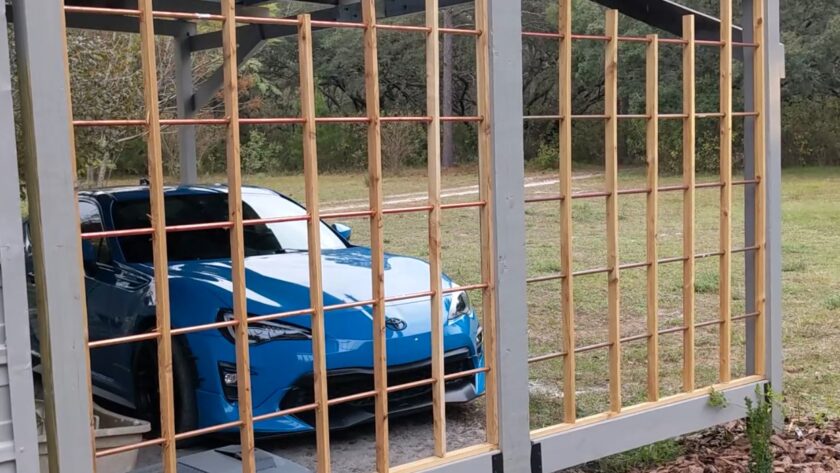
At the end of that garden conversion article, I left off with the trellis on the south facing carport structure (former horse stalls) partially completed. We finished setting the left and center posts (the right post pre-existed in the space). Then we hung the cross beams using black metal brackets. To finish that phase up, I painted all the pressure treated lumber a taupe/gray to match the rest of the building.
While I did have a drawing to which we aspired, we did play fast and loose on the nitty gritty. That’s probably where I wish I would have written precise dimensions down because I would have preferred 2x2s for the final dimensions on the “grid” of the trellis. Instead of purchasing 2x4s and ripping them down, I opted for 1x4s because 2×4 sounded too bulky and heavy. After seeing the final product, I probably would have preferred more enclosure, but I’m hoping to landscape the front with evergreens and, of course, the climbing roses.

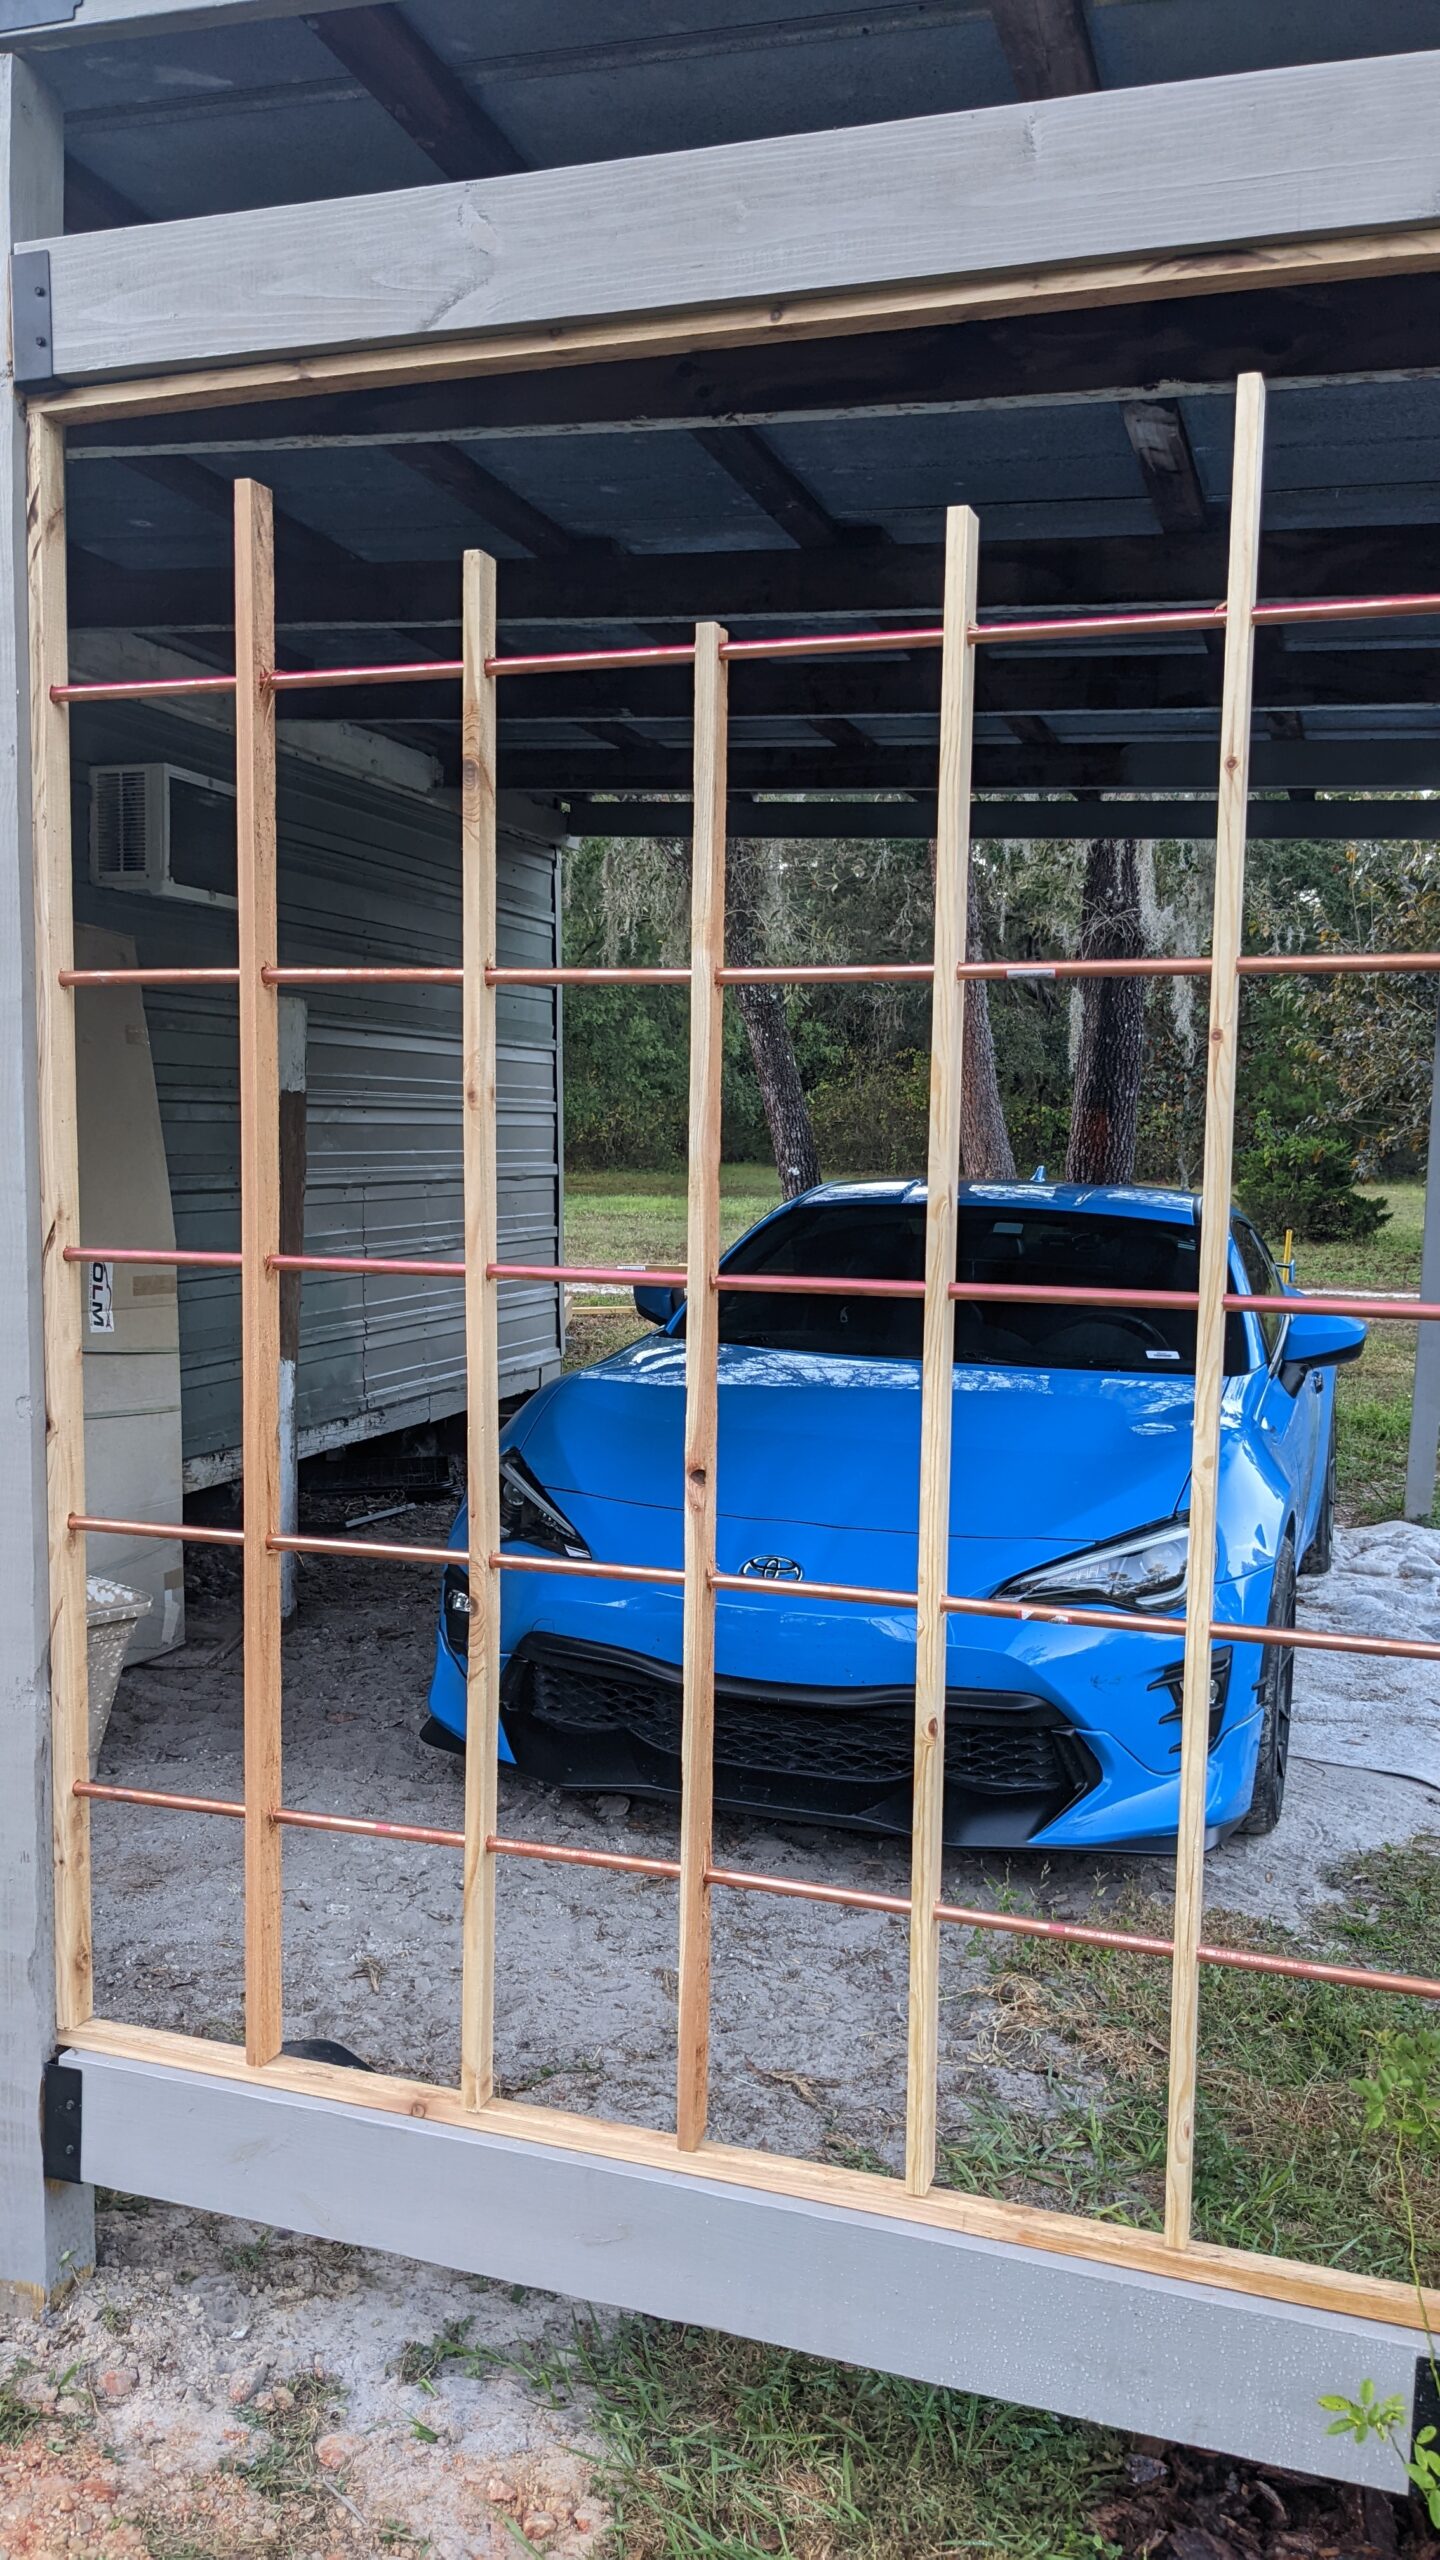
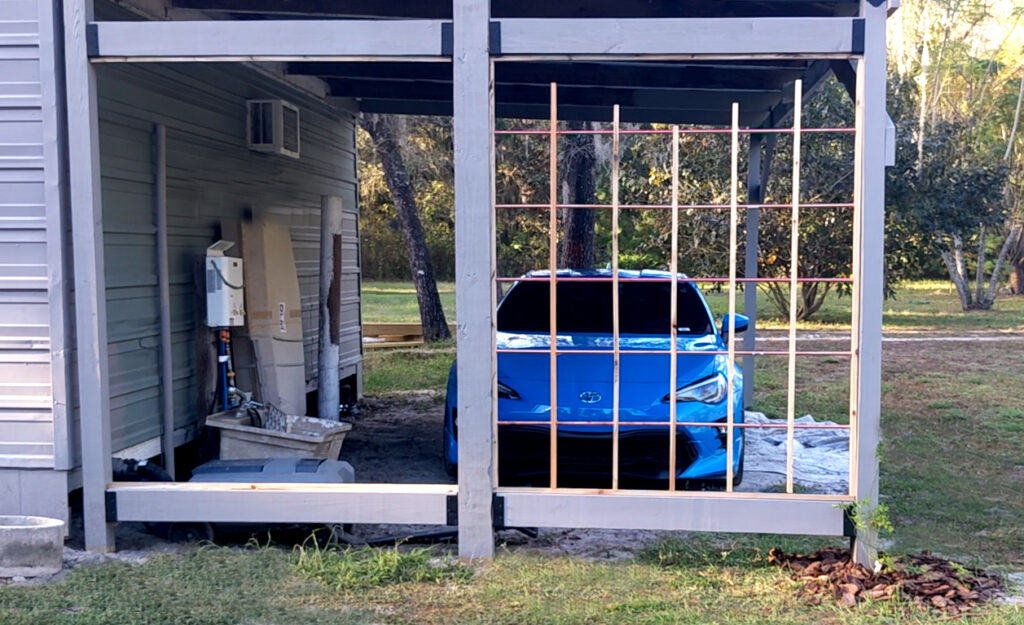
We purchased cedar 1x4s in 12- and 10-foot lengths as well as M-grade 1/2″ copper tubing in 10-foot lengths. The cedar was ripped into 1x2s and nearly all of it was cut down to between five- and six-foot lengths. 6-ft lengths would be the vertical frame and the 5-foot copper would be the horizontal members. On both sides, there would be five inner vertical timbers measuring (2) 5’7″, (2) 5’3″, and the center would be 5′. Here’s the final trellis on the right side… just needs to be sealed.
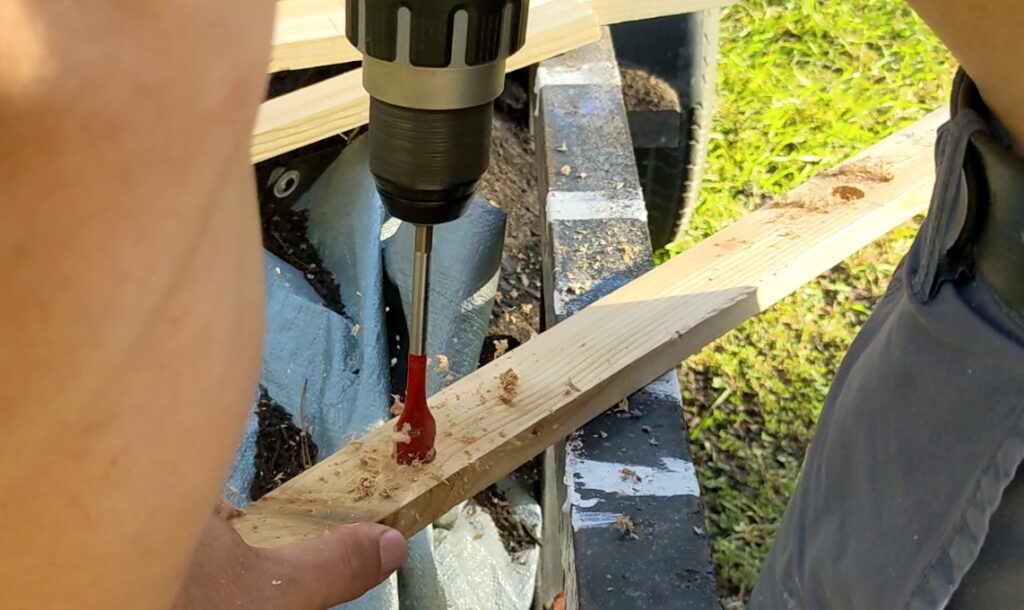
After we decided on the appropriate lengths, we laid them all flat on the driveway, then marked a line across all of them every 11-inchdes.
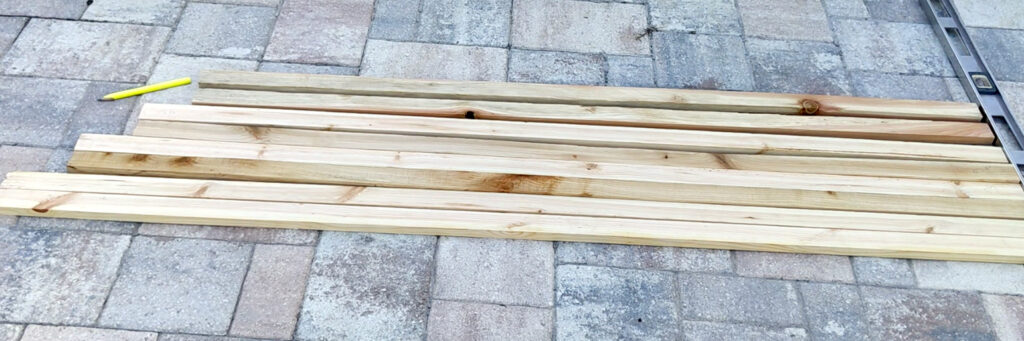
This is where the holes would be drilled for the copper pipe to thread through. The drilling of the holes definitely had the best aroma of the entire project! Mmmmm, cedar.
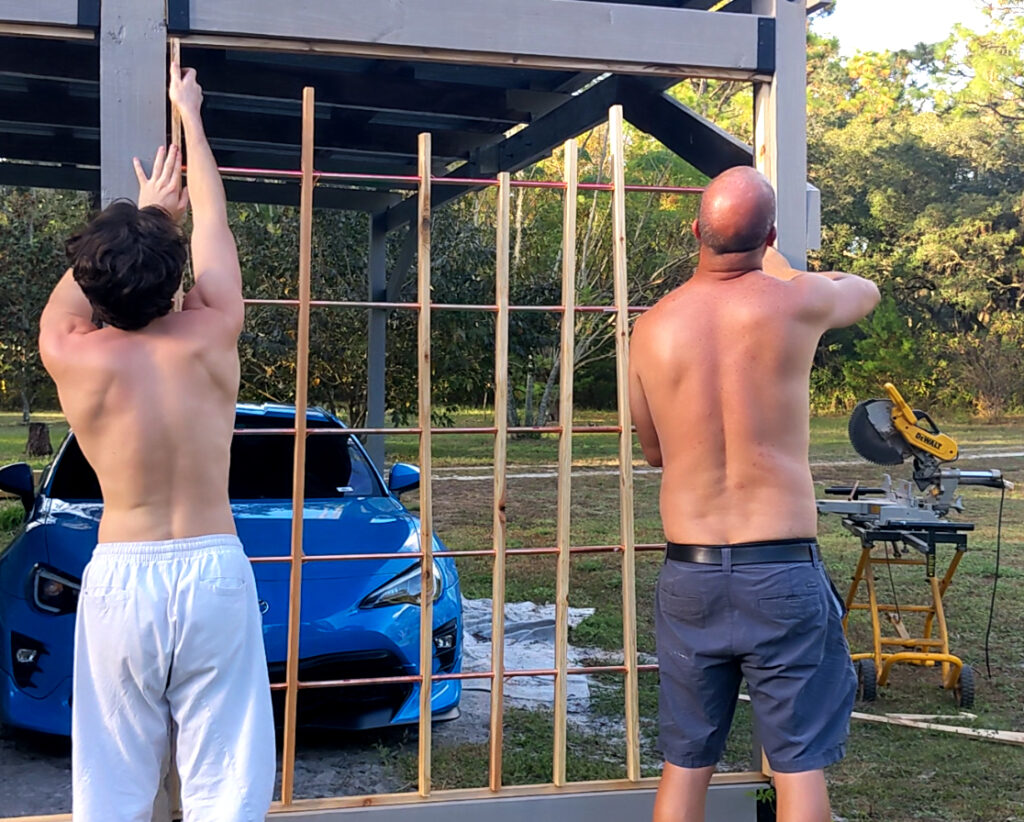
I didn’t get a photo of the copper pipe cutting, but it was best done on the chop saw. The pipe was cut to 5-foot lengths and then threaded through the cedar. It worked best to thread the 6′ side first and use that as a base on the ground, with the copper rods vertically oriented, so that the remaining timbers would have gravity helping position them in place. This part was actually quite easy (and fun) as long as the pieces were in the proper order!

Once they were all threaded through, the section was oriented properly and placed in position on the structural timbers. It didn’t matter if they were spaced appropriately. We did that after the 6-foot frame pieces were screwed in at both sides. At first, we thought this was just a trial run and we would have to disassemble the piece once we ordered rubber gaskets that we would thread through on both sides of each post… but that turned out not to be necessary. The fit was so good, all we did was adjust for spacing along the pre-penciled in marks along the base board. Since we drilled though all of the boards, including the main frame, the copper fit snuggly in the five-foot space between the main architectural posts.
We will likely add spacers to the bottom board to keep the vertical sections from shifting. The hope is that the two Peggy Martin Rose bushes and other landscaping will cover much of this anyway.
Well, we need to get two more 1x4x12 cedar planks to complete the other side. In the meanwhile, I plan to landscape in front by digging out the sand, replacing it with topsoil, and planting another Hurricane Katrina rose in the middle as well as two dwarf pyramidal evergreens in the center of each panel. Not sure if those will be cryptomeria or some sort of juniper… but I’m closing in on a decision. Will definitely finish it off with large pine bark mulch.
For the second side, we repeated the process. The biggest difference is that I set a 6-foot cedar board next to the existing board on the right side of the center post and marked where all of the copper pipe holes were. It is important to me to assure all the pipes are perfectly aligned. I was so nervous through the entire process that we would have to start over again on the left side. We were in a rush since Dakota and Joe were going on a cruise the next day and we all just wanted to get this project completed.
Well, it turned out great. There were a couple things we would have done a bit differently. All-in-all, for the price and ease of construction, this turned out beautiful, better than we could have imagined.

The next phase of this project is to hire contractors to lay pavers for the drive, car park, and path to the back porch (which will be built in phase 3!).
Happy Gardening!